WiFi range extenders can be connected to routers through a cable or a wireless connection. Although wireless connections are trustable, their strength can be affected by external interference causing the extender’s signal to drop. With that said, you should connect Wi-Fi extender with Ethernet ensuring a reliable connection throughout the house. This blog will to explain the concept of wired connection for Netgear extender.
How to Connect Netgear Extender with Ethernet?
You can use the Ethernet ports on your Netgear extender to connect it to the router. However, for that, your extender needs to run on the default settings. Thus, perform a factory default reset of the extender by pressing its Reset button. Once done, follow the steps for an Ethernet connection:
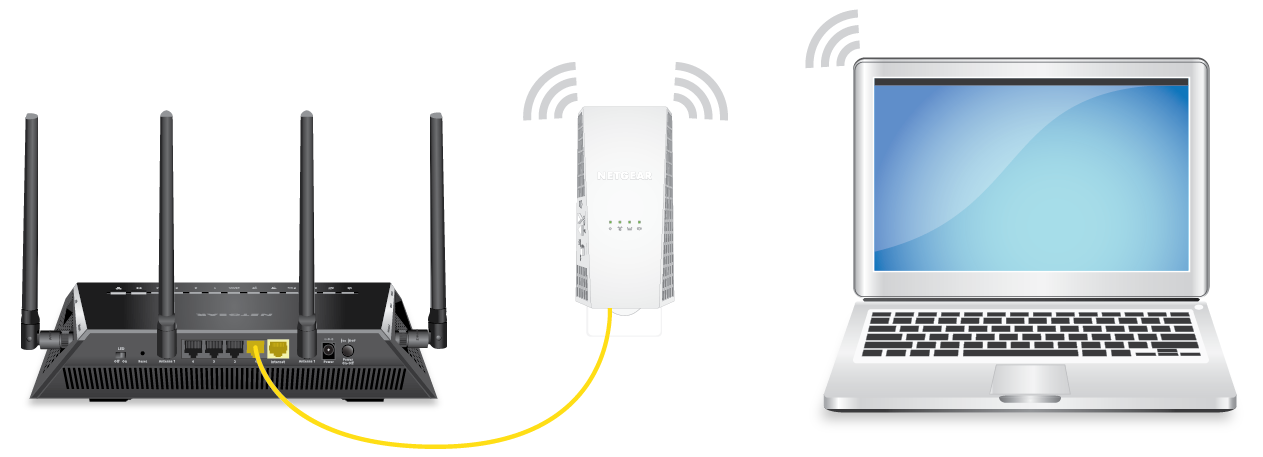
- Ensure that your router and extender are placed in the same room and that they are turned off.
- Now, using an Ethernet cable, connect both devices.
- Use the LAN port of the router.
- Use the WAN port of your Netgear range extender.
- Switch on your router by pressing the Power button.
- Power up your Netgear range extender.
- If your extender has a Mode Selector button (Extender/Access Point) button, move the slider to the Extender position.
- When the extender’s light stabilizes, switch on your computer.
- Find the network named Netgear_EXT on its WiFi network list.
- Connect to the network using the WiFi password provided on the label. The password is also given in the user manual.
- As soon as your PC connects to the extender, the Netgear extender setup wizard will open.
- If you can’t see the wizard, go to mywifiext.net.
Note: When the extender is connected to the router through an Ethernet cable, mywifiext.net won’t work. Apart from that, the default IP address of the extender will also fail. In that case, it is recommended that you log in to your root router and check the IP it has assigned to the Netgear extender. Use that IP to access the Netgear extender wizard.
- On the wizard, you will be prompted to accept the terms and conditions of using the extender.
- After that, a few instructions will show up that will ask you to set an admin password for the range extender.
- The default password for a Netgear extender is “password”. You should change it during or after setup to avoid security problems.
- Also, answer security questions so that you can recover the password if you ever forget it.
- Go through the prompts to complete the setup process.
On the extender’s wizard, you will be able to change the WiFi details for 2.4 and 5 GHz WiFi network, update the firmware, enable FastLane technology, and other similar features. This is to inform you that your devices won’t connect properly and you will get no internet connection if the cable used to connect your devices is damaged. Also, the connection must be finger-tight.
To Sum Up
This was all about how to connect Wi-Fi extender with Ethernet cable. The process was all about joining the LAN port of the router with the WAN port and then accessing the local interface of the extender on a connected computer and modifying the settings. Hopefully, you will be able to connect your extender. Once that is done, you can connect wired or wireless devices to the extender to use the internet services in the dead zones of your house.