
Travel routers or Mobile routers are one of the best investments that a person can make. Just insert a SIM card into its port, configure some settings, and your WiFi will be ready. Companies like Netgear and TP-Link manufactures mobile WiFi routers. In case you are wondering whether it is possible to connect Netgear WiFi extender with Travel router or not, then the answer is Yes.
It is true that a WiFi extender can be connected to a mobile hotspot or router. Given below are the instructions that can be used to connect a mobile router to a Netgear range extender. For your information, you have to access the Netgear Genie setup wizard to complete the process. Thus, have a PC or laptop handy.
Prerequisites to Connect WiFi Extender with Travel Router
You are suggested to note down the SSID and WiFi password of your mobile hotspot or travel router before you connect it to the extender. For your information, the WiFi settings of travel routers like Nighthawk M1 router can be checked from its display screen.
Steps to Connect Netgear WiFi Extender with Travel Router
The steps to connect a Netgear WiFi extender with a mobile router are listed below. However, you need to ensure that your mobile router has enough battery and its SIM card is inserted properly into its respective slot.
- Plug your Netgear WiFi extender in an area where it will not be surrounded by heavy electronic devices.
- Once done, bring your travel router closer to the Netgear WiFi extender.
- Go to your computer now and connect it to the WiFi network of your Netgear extender.
- The default name of the Netgear extender network is Netgear_ext.
- You can refer to the product label to know about the default WiFi password.
- Launch Chrome or similar browser now.
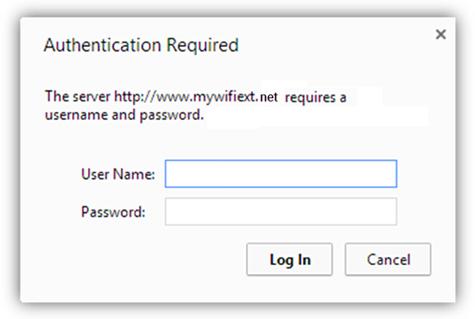
- Visit mywifiext.local if you are using a Mac device. Else, use mywifiext.net.
- You will see a page displaying the terms and conditions of using the range extender.
- Accept them and let the extender scan for the available WiFi networks.
- Look for the SSID of your travel router and select it.
- If the SSID is not visible on the list, rescan the networks or enter the SSID manually.
- Input the mobile router’s WiFi password.
- The upcoming screen will ask you to customize 2.4 GHz and 5 GHz WiFi network settings.
- Assign an admin password to the Netgear extender and follow the on-screen prompts to complete the connection process.
Congratulations! You have successfully connected your Netgear range extender to a travel router. You can now connect your WiFi clients to the newly extended network. Know that the default SSID and password won’t work now. You need to connect your devices to the extender’s new SSID using the new WiFi password.
What to Do If You Can’t Connect WiFi Extender with Travel Router?
If you are not able to connect your mobile router and the Netgear range extender, it might be happening because of already customized settings of the extender. Thus, reset the extender to its default settings and retry.
In Conclusion
Wasn’t the process of connecting a WiFi extender to a travel router easy? We hope that you have gone through the instructions very carefully and will be able to connect NetgearWiFi extender with travel router without any difficulty.