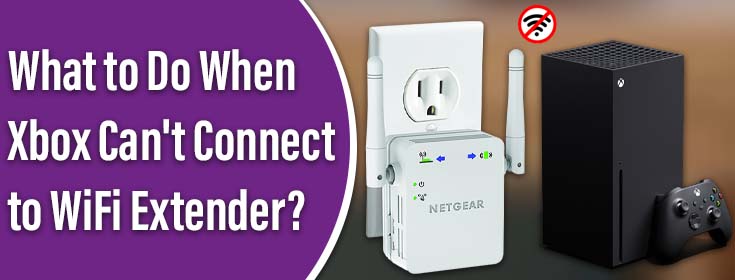
If your Xbox can’t connect to WiFi extender then you can’t play games online or download games. Are you frustrated by such a situation specially, when you feel like playing games right away? This guide will help you fix the WiFi connectivity problem with your Xbox console and Netgear wireless extender. You can also use the same remedies even if you’ve any other router or extender brand.
Groundwork to Do to Connect Xbox to WiFi
1. Test the Network Connection
Make sure that your Netgear WiFi extender provides you with a stable and reliable internet connection. Test its network first. Connect other devices to its network to test the network speed. If you find the connection is unstable then give your extender a quick reboot to give the network connection a push. While you’re rebooting it, check its power connection and the connection with the root router. Fix anything that’s fishy and can affect the WiFi.
2. Get in the Network Range
If you’re trying to connect your Xbox to the WiFi from a place that’s not in the range then you’ll face difficulty connecting to the network. Move the Xbox a little closer and bring it in the range so that the connection becomes easier.
3. Use the Right Password
To connect your Xbox console to the Netgear extender, make sure that you’re using the right WiFi SSID and password to join the network. To connect, go to the Set Up Wireless Network option and select the Netgear extender’s SSID and enter the password avoiding making any typing mistakes.
4. Remove Network Interference
Electronic devices, home appliances, metal objects, reflective surfaces etc. can affect wireless signals by causing interference. If your Xbox can’t connect to WiFi, then there are high chances that any such device or object is causing interference. Move the Xbox console away from them and then try connecting to WiFi extender. You should also try maintaining a direct line of sight from the Netgear extender to the Xbox console so that there’s a minimum of obstruction in the signals.
How to Fix Xbox Can’t Connect to WiFi Extender?
1. Power Cycle the Network
Give your network connection a quick restart by power cycling the network. Use these steps now:
- Unplug the Netgear wireless extender from its outlet.
- Do the same with the main router. Remove its power plug as well.
- Next, hold the Xbox button on the console for some time to turn it off.
- Unplug the Xbox by removing it from the power source.
- Wait for some time now.
- Plug back the Xbox console now and push the Xbox button to power it up.
- Plug in the router and then the Netgear extender.
Make a wireless connection to Xbox by selecting the extender’s WiFi details now. You should be able to make a successful WiFi connection this time.
2. Remove Third Party Accessories
If you’ve connected any third party accessories to Xbox like a headset then there is a possibility that it uses the same frequency as the Xbox thereby causing active interference. Remove any third-party accessories right away before making a WiFi connection.
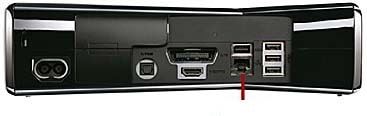
3. Make a Wired Connection
According to the distance separating your Netgear extender and the Xbox console, find a LAN cable of suitable length. Insert one of its ends into the Ethernet port on the back of the console and the other one into the WiFi extender. This makes a wired network connection. Your Xbox should be connected to the extender network now. In case you still can’t connect your Xbox to the internet, then try other hacks.
4. Update Netgear Extender
Your Netgear extender might need as update right away. An older version could be causing trouble while making WiFi connections. Log in to your wireless extender by making use of the IP address 192.168.1.250 to check for firmware updates. Update the extender right away to rule out the possibility of outdated firmware to causing WiFi connectivity issues.
5. Use a Different Channel
If there’s any other nearby network that’s using the same frequency band, this causes network congestion. To avoid this, change the wireless channel on the extender.
- Log in to the extender on a device connected to its WiFi.
- Go to Settings and then Wireless Settings.
- Head to the 2.4 GHz section and change the channel by selecting from the drop-down menu.
- Repeat the process in the 5 GHz section.
- Save the settings once done.
6. Check MAC Filtering
MAC filtering helps to avoid unauthorized access to the Netgear extender. However, the same can also be the reason why Xbox can’t connect to WiFi extender. You can disable MAC filtering on your extender to connect your Xbox console to it.
Another option is to add the Xbox’s MAC address to the extender’s authorized list. Firstly, get the MAC address using these steps:
- Open the guide by pressing the Xbox button first.
- Go to Profile & System.
- Select Settings > General > Network Settings.
- Navigate to Advanced Settings.
Listed here will be your Xbox’s MAC address. Note it down. Log in to your extender and then add this MAC address to the extender’s authorized list. You can now connect your console to the extender’s WiFi without any trouble.
Verdict
Internet connectivity issues are very common. Almost everyone has come across such issues while trying to connect their networking devices to the internet. If your Xbox can’t connect to WiFi extender then at least one out of the numbered solutions provided in this post would have helped you already. With the same hope, we conclude our piece of write-up.