In order to obtain high-speed internet coverage in the dead zones of their homes people tend to connect their WiFi routers with Netgear extenders. In case you also own a Hughesnet router and want to connect it to a WiFi range extender via mywifiext.net login page, we have got you covered. Our blog will let you know the complete instructions on how to connect Netgear extender to Hughesnet router. Continue reading!
The WPS Method to Connect HughesNet Router and Extender
You will be among those lucky people if your Hughesnet router has a WPS button. Know that setting up a Netgear range extender using the WPS method is one of the easiest tasks that you can complete. To do that, you must bring router and the Netgear extender in the same room. First, press the WPS button on your Netgear extender and then on your Hughesnet router. Within a few minutes, both devices will get connected. You are free to connect your wireless clients to the Netgear extender network for unlimited internet connectivity.
Steps to Connect Netgear Extender to Hughesnet Router
1. Power Up Your Devices after Hardwiring Them
You need to create a LAN cable connection between the Netgear extender and the Hughesnet router in the initial stage.For this, you need to run the LAN cable from your Hughesnet router’s LAN1 port to the yellow or blue colored port (Internet) of your range extender. We suggest you check the connection strength before moving to the next step. Now, you should switch on the router and then move to the satellite.
2. Access the Netgear Extender Management Utility
The next step involves making changes to the extender’s settings and commanding it to amplify the signals emitted by the Hughesnet router. Here’s what you are supposed to do that:
- Switch on your laptop and open its WiFi settings.
- Connect to the WiFi network of your Netgear extender.
- You should disconnect any Ethernet cable connected to the laptop.
- Load an internet browser and type mywifiext.net into the URL field.
- The login page of the extender will show up. Here, you will have to key in the user name and password.
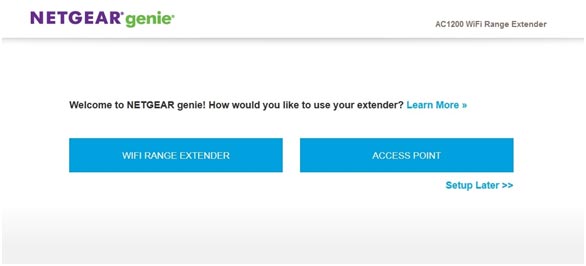
- You will see a page that will ask you to pick up the operating mode for the extender (shown in the image).
- After that, a network scan will occur and you will be presented with a list of networks present in the Netgear extender’s range.
- You are suggested to choose the Hughesnet router’s WiFi network and input its network key when asked for.
- Click Connect.
- The next task is to give a new SSID and password to the 2.4 and 5 GHz network of the range extender.
- After this step, your Netgear extender and the laptop will get disconnected.
- Reconnect your devices using the updated WiFi name and network key.
- Return to the dashboard of your Netgear extender and give it a new admin password.
Note: The admin password of the extender is different from the WiFi password. This password allows you to log in and change the settings of the range extender.
- Your extender will now detect if a firmware update is available.
- If a new version is available, you need to click the Update Now option.
- The extender will reboot once the process completes.
- You need to show some patience during this process.
- Now, reconnect the extender and your laptop.
- On the Netgear extender setup wizard, register your extender.
- The extender is set up now!
In this manner, you can connect Netgear extender to Hughesnet router. Know that you have the liberty of registering/not registering your product. But, if you do so, myNetgear account will keep you updated.
3. Relocate the Extender
Since your Netgear extender is now able to amplify the Hughesnet router’s signals, you are required to relocate it and connect it to another socket. So, disconnect the Ethernet cable joining your WiFi devices. Unplug the range extender. Find a spot that lies in the middle of the internet dead zones and your Netgear extender and power up your extender. To check the WiFi connection range, connect your laptop/tablet/mobile phone to the extender and run a speed test. If positive results are there, you are good to go!
The Concluding Words
Millions fail to connect Netgear extender to Hughesnet router due to their lack of knowledge. However, you won’t have the same fate as theirs if you properly follow the instructions mentioned above. With the hope that you will be able to establish a successful and stable connection between your WiFi devices, we are now wrapping up.
Before we write down our final words, we suggest you give a tip regarding the extender’s location. In addition to be present in the router’s range, ensure that it is away from devices creating electromagnetic interference, objects carrying a large amount of water, and lustrous surfaces.