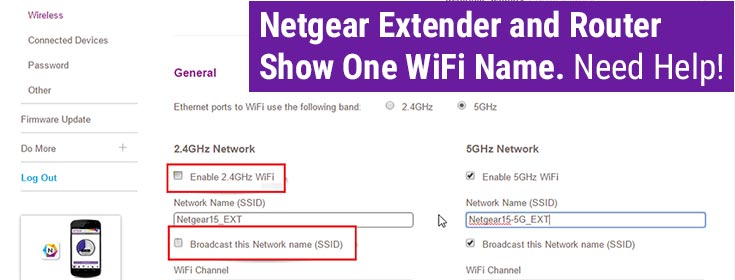
While going through the Netgear user forums, came across a user query. It says the user can not differentiate which network the device is connected to. This is because all the connected devices show one WiFi name or SSID. It does not show Netgear_ext as the network name for the extender separately. Netgear wireless range extender, both wireless bands (2.4 GHz and 5GHz) and the router, all have the same SSID. When he tried to change the SSID by logging in and reaching the settings, he could not do it.
Are you also concerned because a similar issue is troubling you? You should thank Google that it made you reach this post. You will get the sure shot solution to this problem here. Read on.
Why Can’t the SSIDs of Devices be Changed?
Of course, you can log in to your Netgear extender using the Netgear Genie login details and then in the settings, SSID can be changed. You can assign two different SSIDs for both 2.4 GHz and 5 GHz wireless bands. But there’s something that is stopping you from getting this job executed. We will reveal it to you.
You can not update your extender’s SSID because you have enabled the One WiFi name option in its configurations. This very feature will let you have the same SSID or the network name for all wireless bands as that of the main network. This means the SSID of the router will be used by the extender.
This will enable the mesh facility. The Netgear extender works like a mesh WiFi system if One WiFi name is enabled.
What You Should Do Now?
It is simple! All you got to do now is go to the settings of the Netgear extender and disable this option. After that, change the SSID for both bands. Wondering how to go about this process? Fret not! For your assistance, we have covered the steps for the same in the next section.
How to Disable Netgear One WiFi Name?
- Verify the connection between the extender and the router first.
- Check the power supply as well. The devices should be on.
- Get your computer connected to the extender’s network now.
- Visit mywifiext.net on a browser that is updated to the latest version. You can also use the IP address if the URL does not work.
- Log in using the admin credentials. Make sure the right entrees are made without any typos.
- As soon as you reach the admin dashboard, click Settings.
- Next, click Wireless.
- A new page named Wireless Settings will reveal itself to you.
- Here, you will see the option One WiFi Name.
- You will notice it is enabled. This is why you are seeing the same network name for router and extender.
- Use the radio button next to it to disable it.
- Now, set new SSID and password for both wireless bands.
- This can be done on the same page. Use the Network Name (SSID) and WiFi Password fields.
- Finally, click on the Save button to apply the changes done by you.
Note: This disables the mesh facility now. The extender works like a normal extender that is used to extend the existing network.
You can now connect your client devices to the Netgear WiFi extender’s network easily without getting confused. Not just this, different wireless bands can also be connected as they both have different network names now.
The Final Note
We hope the information provided in this post was useful and it suffices to help you get rid of the one WiFi name problem that you were stuck with. We anticipate that you can now easily identify which network the device is connected to. With the hope of helping you out, here we conclude our piece of write-up.


