“The WN3000RP setup is very simple and can be easily done using the right guidelines”.
Almost all of us have experienced this – there are always some spots in the house where wireless reception reaches a dead angle. It can be your backyard, basement or garage. The culprits include thick walls, unwanted radio interference, and a limited range of your router.
So the question is how can we expand the wireless network range?
Of course, the most agreeable solution is to use the wireless extender, so today we will bring you a universal wireless extender – NETGEAR WN3000RP. The Netgear WN3000RP setup is very simple and easy to execute.
Let’s see, what’s inside:
- NETGEAR WN3000RP – Gadget Introduction
- WN3000RP Setup Procedure
- WN3000RP – Technical Specifications
Netgear WN3000RP Introduction
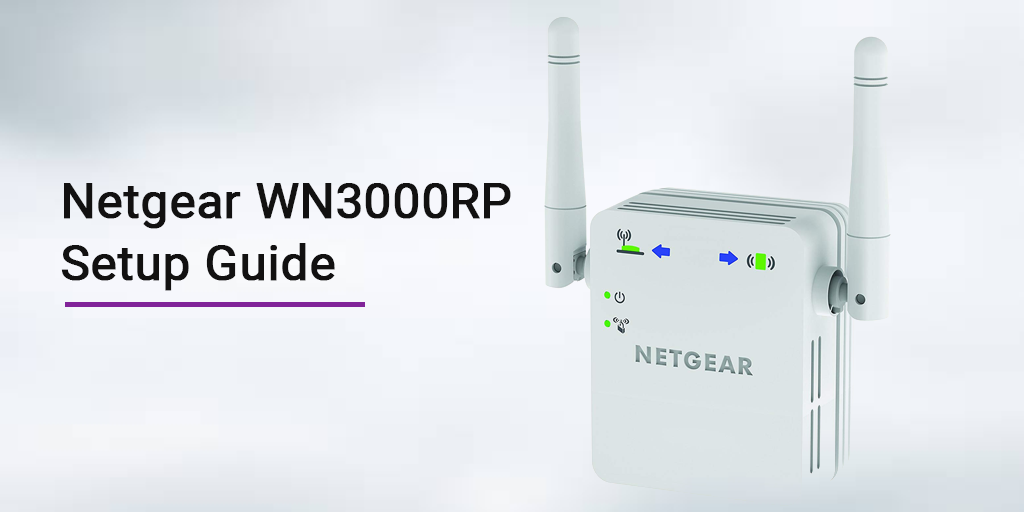
The NETGEAR WN3000RP has a sleek module design. The overall shape is not small or even thick, but it is very practical. The ivory-white color of the whole machine, the NETGEAR logo, and the top cover of the piano paint make the WN3000RP look very elegant and stylish.
The NETGEAR WN3000RP is a universal wireless extender that extends the existing wireless signals and eliminates wireless blind or dead spots. The WN3000RP has excellent compatibility and thus works with any NETGEAR or other brand of wireless routers or gateways. It complies with the mainstream 802.11n wireless specifications and has a maximum transmission rate of 300 Mbps.
WN3000RP Setup – Detailed Steps
The NETGEAR WN3000RP is relatively simple to set up using the mywifiext.local setup. Users only need four steps to connect the extender to the router’s wireless network, getting the extender setup, and finalizing the extender’s wireless settings.
Setup Step First: Search and connect remote wireless SSID
The first time you enter the Netgear genie setup interface, there will be a minute to scan the surrounding wireless hotspots, and then a bunch of scanned wireless networks will be given. Select the one that you wish to extend and click “Continue”.
Setup Step Second: Enter the secret key/ password of the home wireless network
After connecting to the home wireless network, you need to enter the wireless key of the SSID, so that the connection with the router can be completed.
Setup Step Third: Now you need to set the local wireless network SSID for the extender
After the remote wireless network connection is successful, it is time to set the SSID of the NETGEAR WN3000RP. As for the wireless key, you can either use the router’s password key or set it yourself.
Setup Step Fourth: Complete and save the final settings.
So far we have completed all the settings of the WN3000RP, now just hit the “save” button and power-cycle your gadget. Thereafter, you can place it to a central location of your house to get homogeneous wireless coverage throughout.
Note: After the fourth step, update the firmware of the extender if needed. Read here – How can I check the firmware of the Netgear extender?
Netgear WN3000RP Specs
There are four LED indicators on the front of the WN3000RP. Which displays the current router’s signal quality, data transmission, WPS encryption, and Wi-Fi working status. At the same time, the indicator light can also display any fault.
This astonishing extender integrates a 100M LAN port so that the desktop can also use the wireless network. In addition, the device reset key, WPS one-key encryption is also set next to the Ethernet port, which makes it very convenient to use.
The two external gains of the WN3000RP are 2dbi high-performance omnidirectional antennas, which can fully meet the wireless signal coverage. The two can be rotated at a certain angle, much like the antennae of the robot, but not detachable. Its power plug has the standard two plug-in designs, compatibility is quite good, can adapt to most of the socket.
The WN3000RP has a product information label on the bottom. This label has the default IP and MAC address, default username, and password, which is greatly convenient for www.mywifiext.net configuration and use.